
Ingredients:
-
Paneer (Cottage Cheese): 200–250 grams (cut into cubes)
-
Onion: 1 large (finely chopped or sliced)
-
Tomatoes: 2 medium (pureed or finely chopped)
-
Capsicum (optional): 1 small (sliced or diced)
-
Cumin seeds (Jeera): 1 tsp
-
Turmeric powder (Haldi): ¼ tsp
-
Red chili powder: ½ tsp (adjust to taste)
-
Coriander powder (Dhania): 1 tsp
-
Garam masala: ½ tsp
-
Salt: to taste
-
Kasuri methi (Dried fenugreek leaves): 1 tsp (optional)
-
Ginger-garlic paste: 1 tsp
- Oil or Ghee: 2–3 tbsp
- Fresh cream or milk: 2 tbsp (optional, for creaminess)
- Coriander leaves: for garnishing
- Water: as needed for gravy consistency
Instructions:
- In a heavy-bottomed vessel, bring milk to a boil over high heat.
- Once it starts boiling, reduce the flame and add the curd gradually.
- Stir continuously. The milk will start to curdle, and whey will separate.
- Once fully curdled, switch off the flame.
- Let it sit for 10–15 minutes at room temperature to cool slightly.
- Add cold water to the curdled milk to settle it.
- Strain the mixture using a clean muslin cloth or fine sieve.
- Squeeze out excess water gently to form a soft paneer block.
- Hang or press with weight for 30 minutes to set into desired firmness.
Nutritional Information (General):
- Calories: 265 kcal
- Carbohydrates: 4g
- Protein: 18g
- Fat: 20g
- Calcium: 480mg
- Iron: 0.2mg
Cooking Tips & Variations:
- Curdling agents: You can replace curd with lemon juice or vinegar (2 tbsp per ½ litre milk).
- Soft paneer: Stop pressing early for soft, crumbly paneer – great for bhurji or desserts.
- Firm paneer: Press under weight longer for firmer blocks suitable for frying or grilling.
- Flavor twist: Add a pinch of salt or crushed pepper while curdling for flavored paneer.
Common Mistakes & Fixes:
- Milk didn’t curdle: Use full-fat milk and ensure it comes to a full boil before adding curd.
- Paneer too crumbly: Don’t over-stir after curdling; allow it to settle before straining.
- Rubbery paneer: Don’t overcook after curdling, as this can make it chewy.
Chef’s Tips & Tricks:
- Always use fresh full-fat milk for best yield and texture.
- Use a clean muslin or cheesecloth to strain – avoid fine sieves alone.
- For smoother paneer, knead it briefly after draining.
Brand Suggestions:
- Milk: Tesco or Sainsbury’s Whole Milk
- Curd/Yogurt: Yeo Valley Organic Natural Yogurt, or Greek-style yogurt
- Muslin Cloth: Lakeland Cheese Cloth or Amazon UK cheesecloth rolls
Equipment & Tools:
- Heavy-bottomed saucepan or vessel
- Ladle or spoon for stirring
- Muslin cloth or cheesecloth
- Sieve or colander
- Weight (for pressing paneer)
- Mixing bowl
Pairing Suggestions:
- Add to dishes like Palak Paneer, Paneer Butter Masala, or Paneer Tikka.
- Use in sandwiches, rolls, or as a protein in salads.
- Sweet variation: crumble into sweets like rasgulla or sandesh.
Allergen Information:
- Dairy: Contains milk – not suitable for lactose-intolerant or dairy-allergic individuals.
- Gluten-Free: Naturally gluten-free.
- Vegan: Not suitable – use tofu or nut-based cheese alternatives for vegan versions.
Recipe Instructions Step by Step:
Step 1: Boil the Milk
Pour ½ litre full-fat milk into a heavy-bottomed vessel. Bring it to a rolling boil on high flame.
Step 2: Add the Curd
Lower the flame and slowly add 1 bowl of curd. Stir gently.
Step 3: Curdle the Milk
Keep stirring until the milk separates into chenna (curds) and whey (watery liquid).
Step 4: Let it Rest
Turn off the flame and allow the curdled mixture to rest and cool for 10–15 minutes.
Step 5: Strain the Mixture
Place a muslin cloth over a sieve or colander and pour the mixture into it. Discard the whey or save it for other use (kneading dough, soup base, etc.).
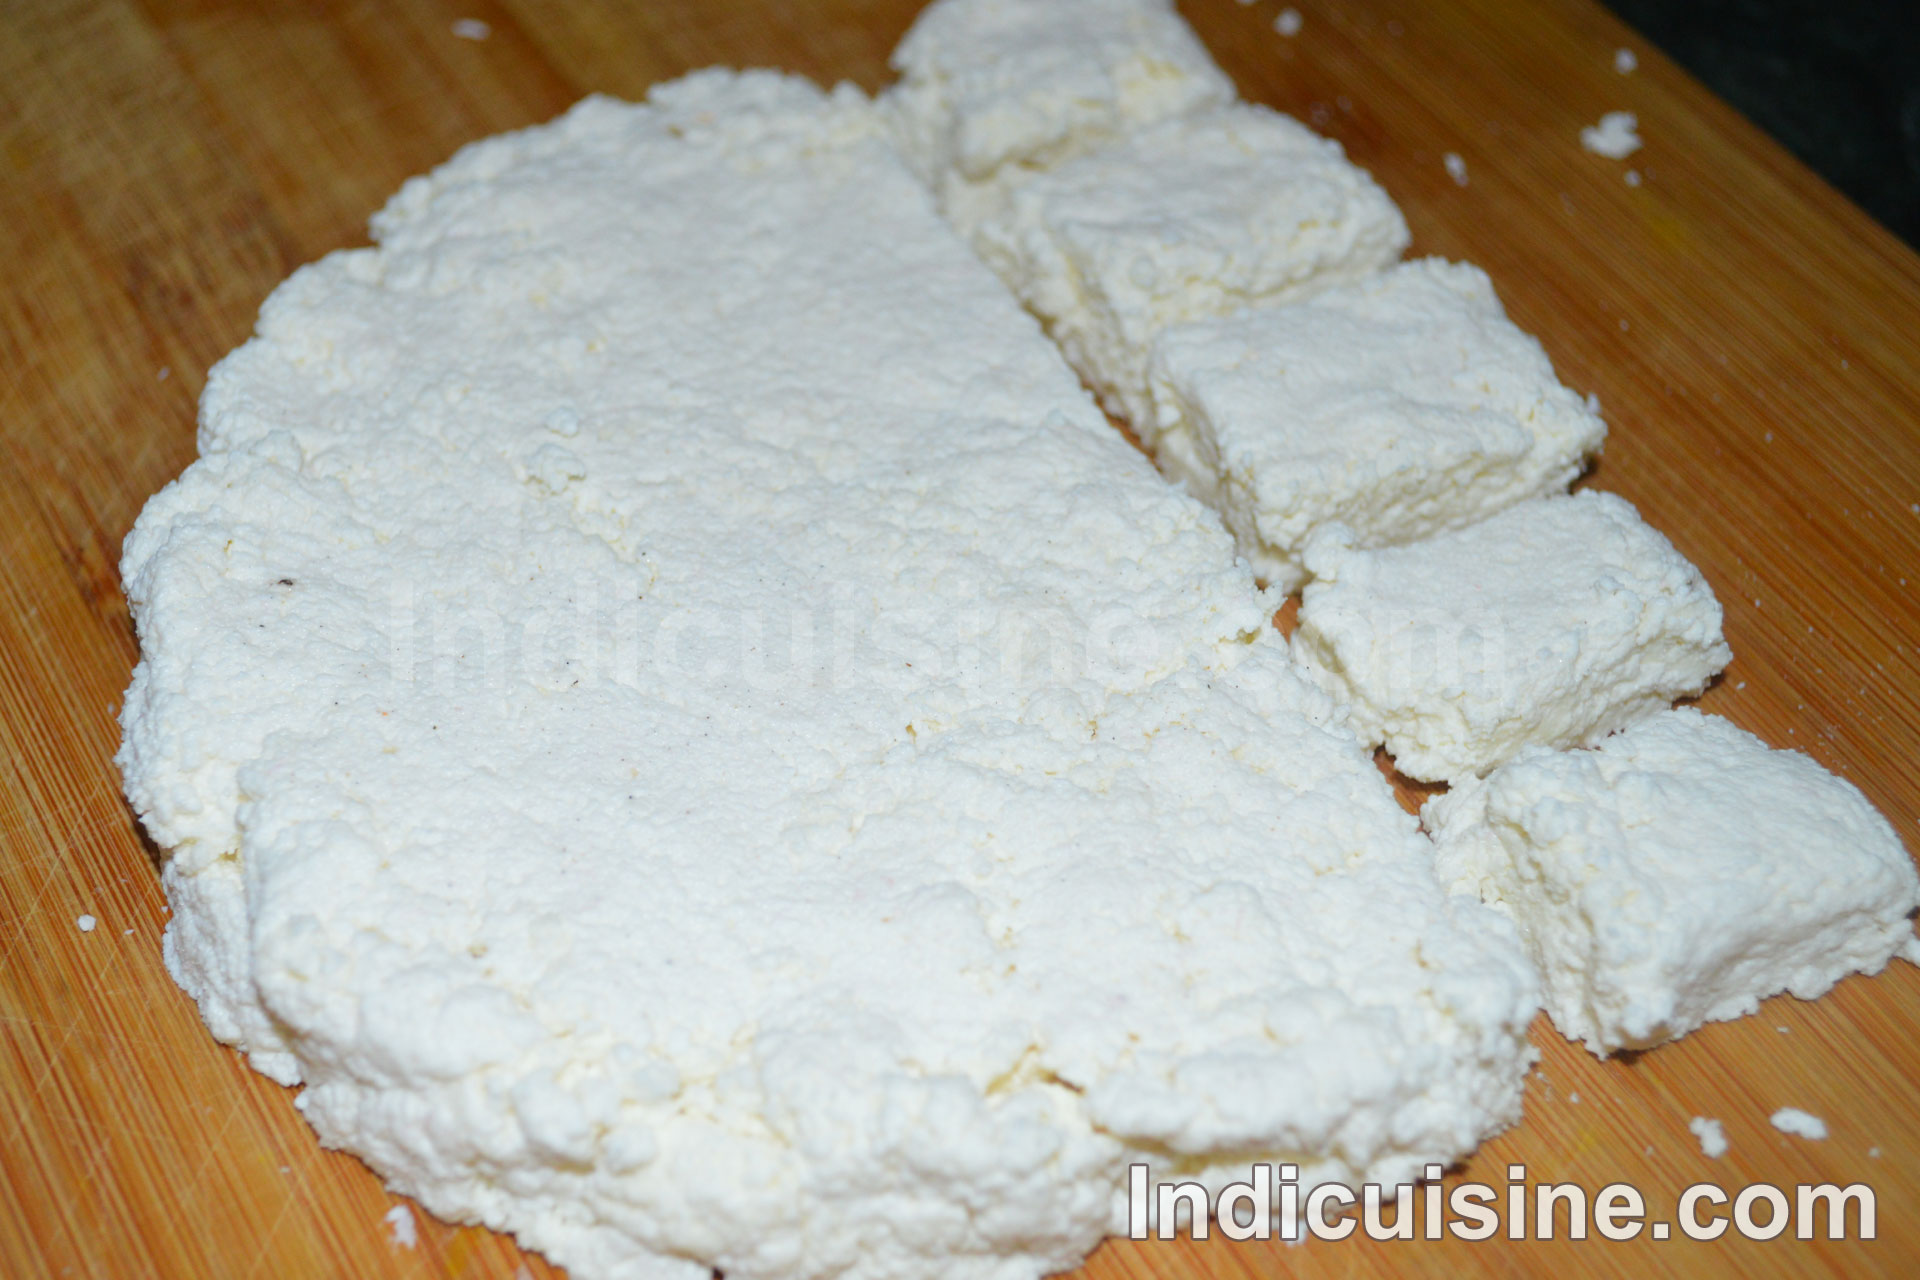
Step 6: Shape the Paneer
Rinse the chenna under cold water to stop cooking and remove sourness. Gather the cloth edges and gently squeeze out extra water.
Step 7: Set the Paneer
Press the paneer in the cloth under a heavy object for 20–30 minutes, depending on how firm you want it.
Step 8: Ready to Use
Once set, remove from cloth. Your homemade paneer is ready to be sliced, cubed, or crumbled for use!